


When it comes to macro photography, knowing how to properly focus stack your images can make a massive difference. To that end, the walkthrough above and Photoshop tutorial below offer a fantastic explanation of what focus stacking is.
Get Started for FREE
Sign up with Facebook Sign up with X
I don't have a Facebook or a X account


 Your new post is loading...
 Your new post is loading...
Your new post is loading...
When it comes to macro photography, knowing how to properly focus stack your images can make a massive difference. To that end, the walkthrough above and Photoshop tutorial below offer a fantastic explanation of what focus stacking is. 
No comment yet.
Sign up to comment
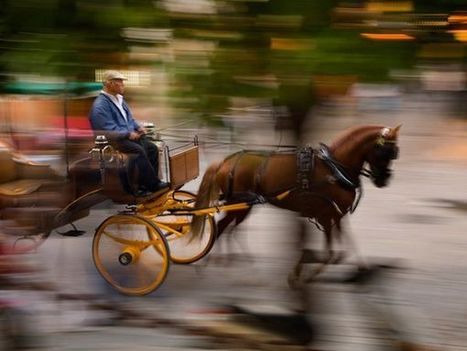
Read about photographer Jim Richardson's experience with travel photography and get advice on trying new photography techniques, such as panning, from National Geographic. Panning is nothing new. It’s been around almost as long as photography itself. Originally it was forced on photographers who had no hope of capturing fast moving action without moving the camera in synch with their subjects. They simply lacked film that was fast enough to give them a fast shutter speed.
Kitty Fisher's insight:
Panning in motion is one of the tougher aspects of being a photographer on the go. Not only are you trying to show the movement that is happening but you want the object or person to be slightly in focus. Jim Richarson gives us a few hints from his own personal experience.
Most photographers already know the basics of product photography – getting the right lighting, using a white background, changing the camera focus and getting close-up shots. But most of them only know these simple tricks. The same angles across several product photos create a generic, plain, and sometimes boring display. It’s a good idea to mix things up in order to achieve variety and uniqueness between different products and product types. It would be ideal to have different angles at least on every product type. Having a story behind a product photo will most likely make it more attractive and interesting. People are intrigued by the scene or story behind a photo. In short, it stimulates ‘eye to brain’ interaction. However, it should be kept in mind that creating a scene requires various props or more objects inside a photo. Be sure not to shift the viewers attention away from the actual product itself. Remember that soft lighting (fewer shadows) should be maintained despite the additional props within the photo. Go MacroIn a series of photos, having a few macro shots within them makes a very good photo bundle. It makes the series more eye-catching and drool-worthy. It allows better focus or a better look at important features of a product. It also gives a product photo a better sense of attention to detail.
Kitty Fisher's insight:
We never think about 'product' shots. How do you set it up, what do you want to sell or what story do you want to come across? Or did you know that depending on the background you pick, that alone can make it the product more desirable.
Learn how to make any interior space shine with these expert photography tips. Choose the Right Perspective. Interior Photography calls for taking a couple of steps back and shoot from one of the corners, or with the camera pressed against the walls. When you scope out the space you are about to photograph, try all different corners for a variety of persepectives, and only then choose to focus on the on that captures the room at it's best. Wide Angles, when you want to capture as much of the space as possible, a wide angle is the way to go. For a good wide angle, you will need to use specialized gear. Most experts agree that a lens ranging from 16mm to 24mm will give you an optimal wide shot of the interior. Too wide will result in perspective distortion, through, so make sure you get a lens that is appropriate for the range of space sizes you intend to photograph. Eliminate Blurring, even if you have the steady hands of a surgeon, there's no reason to risk blurry images. You want to keep your indoor photos sharp, so it's best to use a tripod. As an extra stabilizing measure, use your camera timer to make sure the shot it untainted by any movement that might be caused by your excited fingers.
Kitty Fisher's insight:
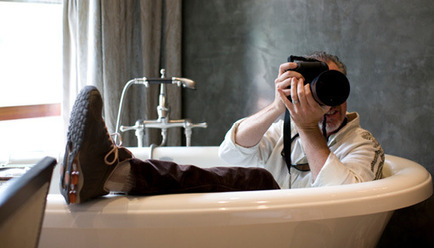
With the involvment of Interior shots, it can get somewhat messy and unprofessional. And no one wants that. Even if you have to slip into a bath tub just to get the mirror framed right, do so. A different perspective can adjust the whole area of the room, in seconds.
|
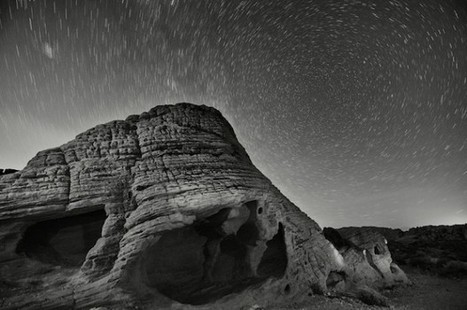
How do you capture a beautiful scene after sunset? Check out these night photography tips from Matt Hill to find out.
Kitty Fisher's insight:
Matt Hill has a great explanation when it comes to shooting the scene after sunset. First off instead of just snapping the photo and moving on, turn that scene into a work of art. Take the time to think it through and collect that moment. Don't allow the magic of photography to loose its appeal.
It happens when you inadvertently move your camera when you press the shutter button. This is harder to stop than what most photographers believe. It actually takes a good deal of practice to steady your hand so that you don’t shake it when pressing the shutter button. Even the slightest camera shake can create distortions in the image or reduce its sharpness. So this is something you should master from the very beginning. It’s vital to get yourself in the habit of always checking your camera settings before you go from one shot to the next. So many times in the annals of photography, people have found out, much to their chagrin, that their perfect picture-taking opportunity was absolutely ruined by camera settings that were totally out of whack.
Kitty Fisher's insight:
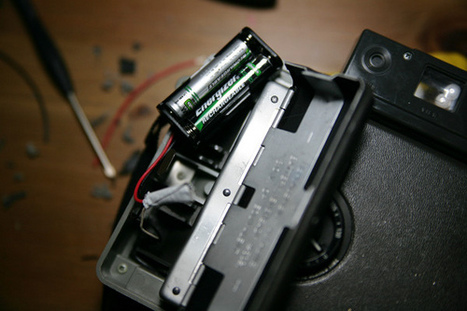
We have been seeing a lot of "back to basics" articles...and this one is no different. It even touches upon some issues that are easily left out. Like, remembering to reset those camera settings and having charged and extra batteries on your person. Tip: During the winter, place the batteries in an inside pocket of your coat to keep them lasting longer, the cold extracts the energy, to where they will not last as long.
No tripod? Use a lamp!
This is the coolest camera trick I’ve seen in a long time. If you take off your lens and hold it in front of the camera, you get a macro lens! I was really skeptical about this, but I just tried it and it worked like a charm. There are four things you need to know about using this trick: (1) Your camera won’t take a picture with the lens off unless you’re in manual mode. (2) The best focal length seems to be around 50mm, so either a 50mm prime or an 18-55mm kit lens would be perfect! (3) Obviously, you lose autofocus since your lens isn’t attached to the camera. Focus is achieved by simply moving closer to or further away from the subject, and (4) The camera can’t open up the aperture, so you’ll do it with your hand. On the back of the lens (the side you mount on the camera), move the little plastic slider piece that controls the aperture. If you look in the lens while doing it, you’ll see the hole open up. If you want to take this a step further, you can buy a reverse lens mount for $5 or $10 which should sharpen up the images quite a bit since it will hold the lens more solidly. Also, be sure to use a tripod when doing this or any other macro photography. With such fine detail, even a tiny movement can destroy the sharpness.
Kitty Fisher's insight:
Have you ever wondered...how did so and so do that? Or take that photograph? Need a tripod, no big deal use your lamp. Crazy to think about, but it works and honestly if you just need something to stand up your camera without having to by a tripod for that moment. This is your solution. Maybe the solution for your needs is one of these strange tricks.

How to Photograph Silhouettes: Silhouettes are a wonderful way to convey drama, mystery, emotion and mood to the viewers of your photos and often stand out in an album because of the combination of their simplicity but also the story that they convey. The basic strategy you'll need to employ in taking silhouette shots is to place your subject (the shape you want to be blacked out) in front of some source of light and to force your camera to set its exposure based upon the brightest part of your picture (the background) and not the subject of your image. in doing this your subject will be under exposed (and very dark, if not black). Choosing a Strong Subject: Almost any object can be made into a silhouette, however some are better than others. Choose something with a strong and recognizable shape that will be interesting enough in its two dimensional form to hold the interest of those viewing your image. Silhouettes can't draw on the colors, textures and tones of subjects to make them appealing - so the shape needs to be distinct.
Kitty Fisher's insight:
Silhouette photos are some of the most captivating. There's something about the subject being blacked out while the background is littered with colors, of even a sepia or black and white toned sky. But framing your image will set up your destined effect.
|


Macro means getting up close and personal. But focus stacking which combines several images, shot at various angles to make sure that the image is in complete focus.